This guide will get your station up and running in minutes. We won’t waste too much time explaining everything. Just follow each step.
At https://clients.torontocast.com you can purchase the service you require. This is the main area for controlling all the services and billing for your TorontoCast streams. There is a ticket system here for billing enquiries and if you are having difficulties accessing any of your services.
Your first choice is to select the package you want. You can go for SHOUTcast or Icecast. If being in the SHOUTcast directory is important to you, go for that. If you are not sure, I would recommend Icecast. It’s open source and for the end user there is no difference.
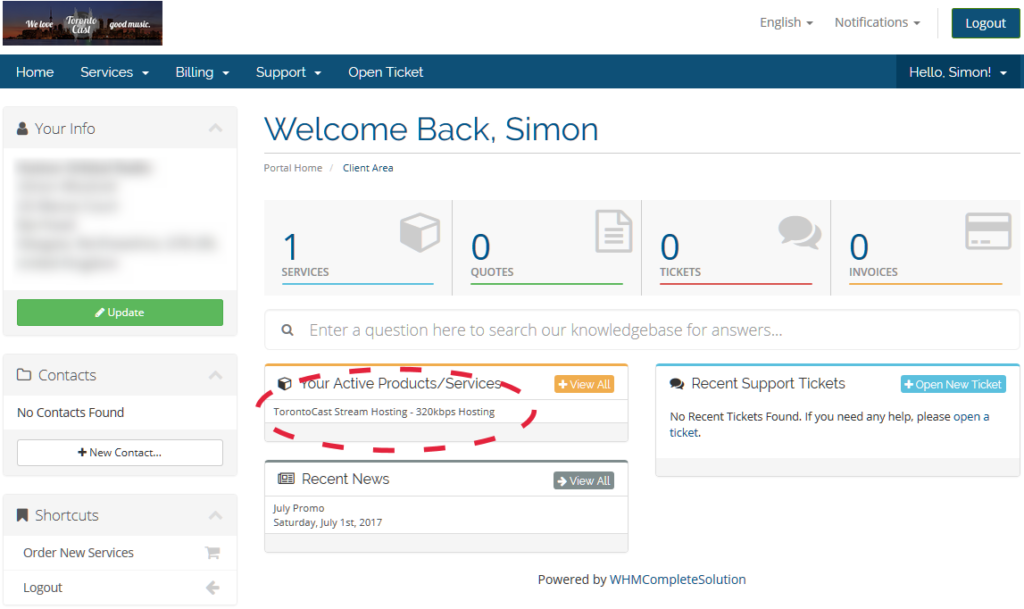
In the middle of this screen you will see an orange section listing Your Active Products/Services.
Click on the text detailing the service/product you wish to access.
You will be taken to a Manage Product page.
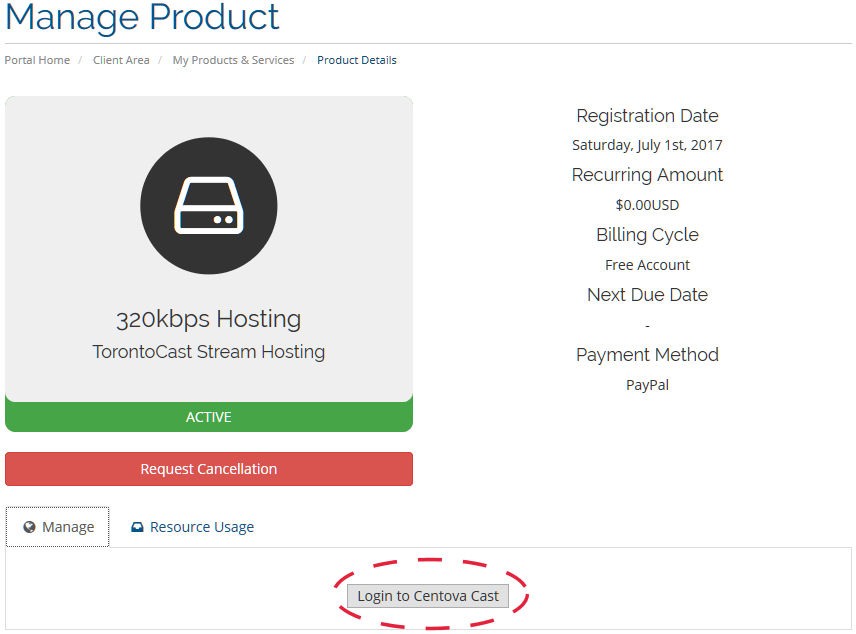
Here it will list all the details about that service including billing information.
You can cancel your service here if you require to.
Clicking on the Resource Usage tab will show you how much disk space you have left.
For now, click on Login to Centova Cast.
Centova Cast is a well-established third party control panel for managing internet radio streams. This gives us a solid stable platform. It also provides support from a much larger community at www.centova.com . You will find a wealth of information here.
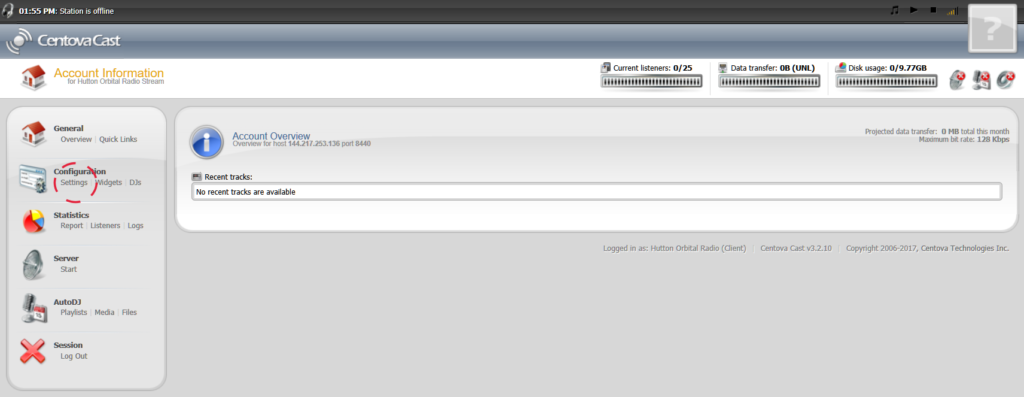
In the left-hand navigation panel, click on Settings under the Configuration section.
This will open to the Stream tab.
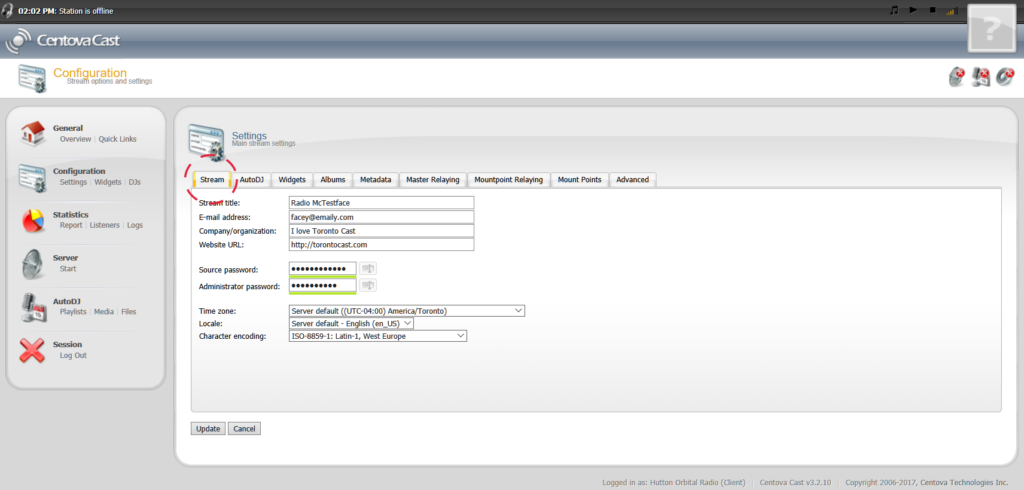
Fill out the following:
- Stream title: The name for your radio station stream.
- E-mail address: Your email address
- Company/organisation: The name of your radio station goes here.
- Website URL: The website to your radio station. Start it with http://
You can set up a facebook page if you don’t have your own website. - Time zone: Set it for your location.
Now click on the AutoDJ tab.
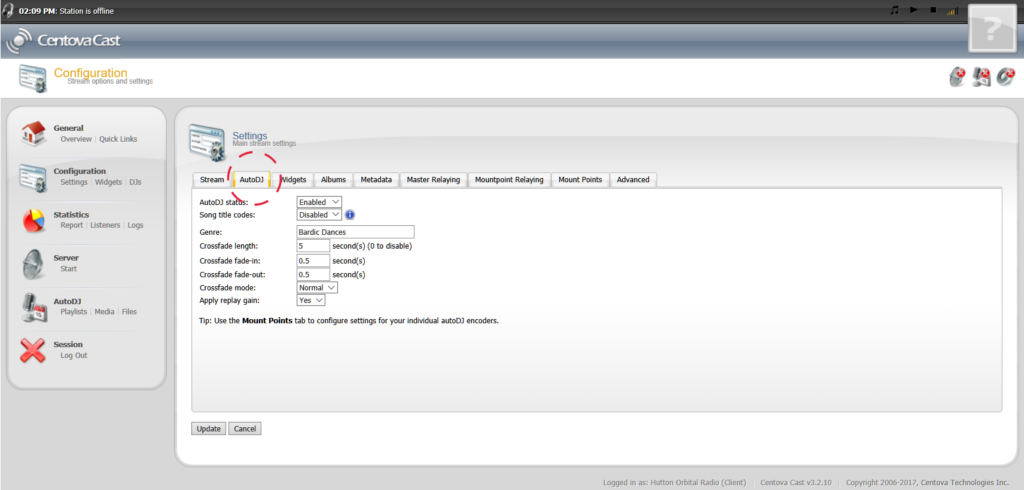
- Ensure AutoDJ status is set to Enabled.
- Set the Genre: to your radios primary genre.
Now click on the Mount Points tab.
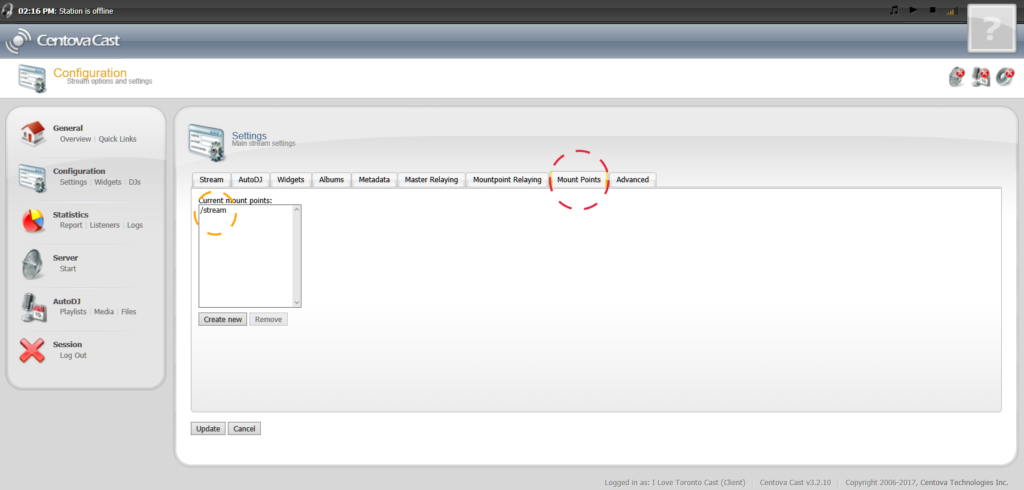
Then click on /stream
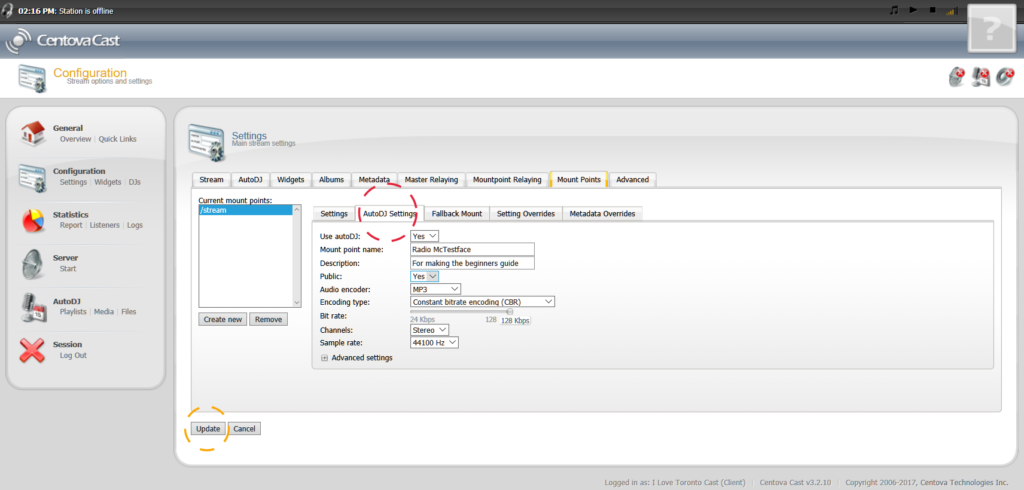
Click on AutoDJ Settings.
- Ensure Use autoDJ is set to Yes.
- Mount point name: should be your stream name again.
- Description: should be about your stream.
- Set Public to Yes if you wish to appear in the SHOUTcast or Icecast directory.
Now click on Update to save your settings.
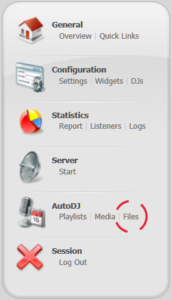
Now we need to get some music uploaded.
Click on Files in the AutoDJ navigation section.
![]()
Things are so much easier if you start organised.
Lets create some folders and upload some tracks into it.
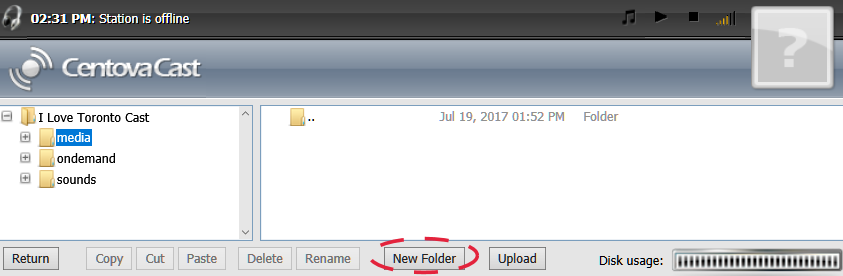
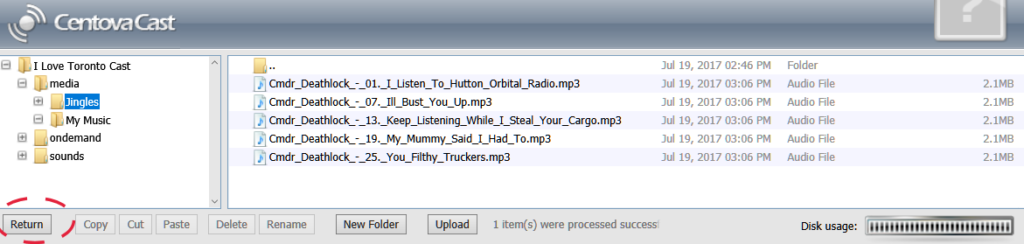
Make sure you select media in the left hand panel. Click on New Folder.
Call it My Music
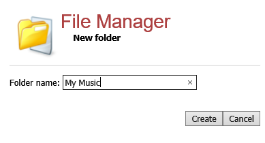
![]() Repeat the above and this time create a folder called Jingles.
Repeat the above and this time create a folder called Jingles.
In the left hand navigation panel select the folder you want to upload tracks to. My Music in this example.
Now click Upload.
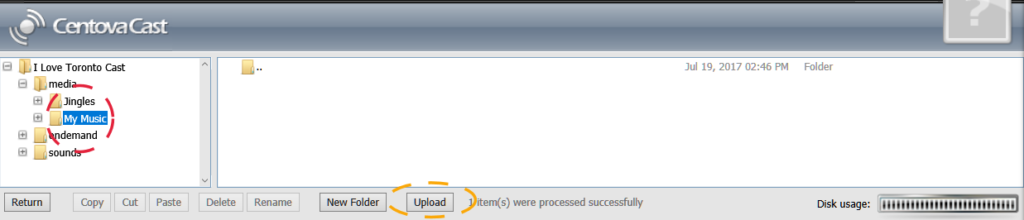
Click on Select Files :
You will now have a window open allowing you to navigate to the place you keep your music on your own PC.
You can select as many files from your PC music folder as you want.
Once you have made your selection click Open,
Your files will now start uploading automatically.
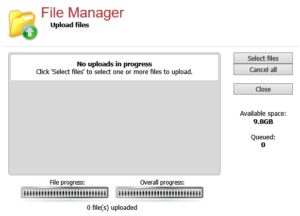
Once completeded you can browse for more files until you are happy.
Once you have finished uploading to the My Music folder, The Overall progress bar will be fully blue, and the top of the window will say no uploads in progress.
Click on Close to return to the Files options.
Select Jingles from the left Navigation pane and repeat the process, this time uploading your radio jingles.
Once all your uploading is done, click on Return at the bottom left of the screen to be taken back to the main screen.
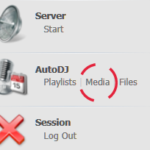
This time click on Media in the AutoDJ section of the lefthand side navigation panel.
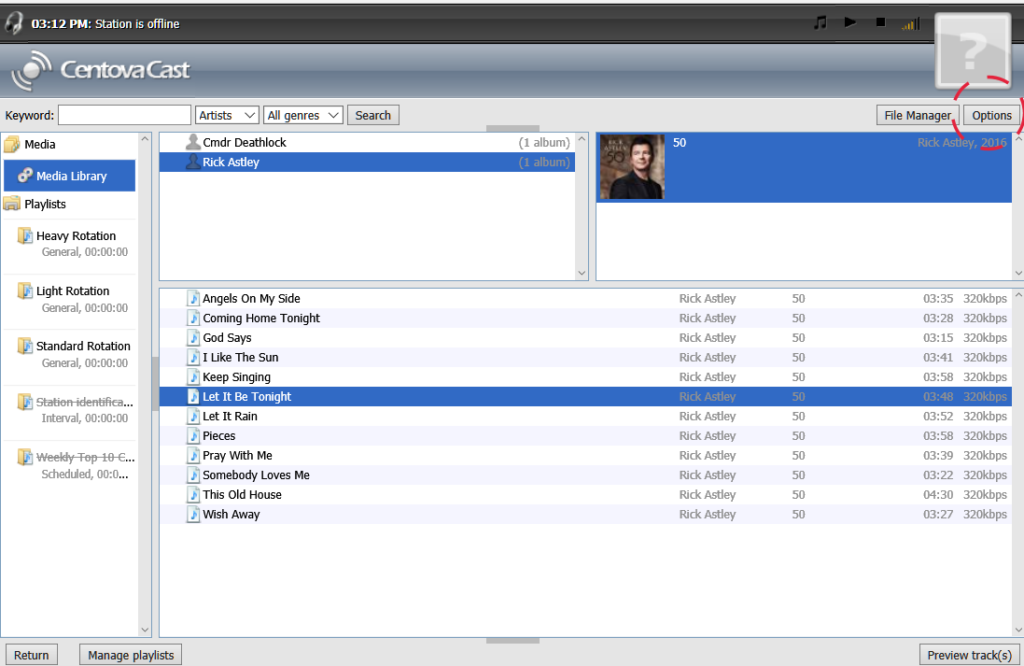
The default view here is showing my artist. Clicking on an artist in the top left panel, then selecting an album from the righthand side will show the tracks available. This is where you can preview your uploads.
But lets go get the more useful view –
- At the top right, click on Options and select Browse by Folders.
- Click on the + next to your music folder (My Music)
- Click on the first track.
- Scroll down to the last track, press shift and click on the last track to select all the tracks.
You have now selected the entire contents of your music folder. - Click and hold the button inon the blue selection.
- Drag those file across until the mouse pointer is over the Standard Rotation playlist in the left navigation bar.
- Let go of the button.
![]()
Underneath Standard Rotation you should now see a total play time of tracks added.
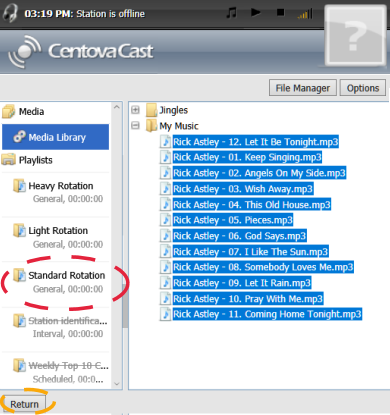
Repeat for Jingles into the Station Identifications playlist
(Click the + next to Jingles, select them all and drag them, this time to the Station identification playlist).
Click on Return.
![]()
 Click on Playlists in the AutoDJ navigation section.
![]()
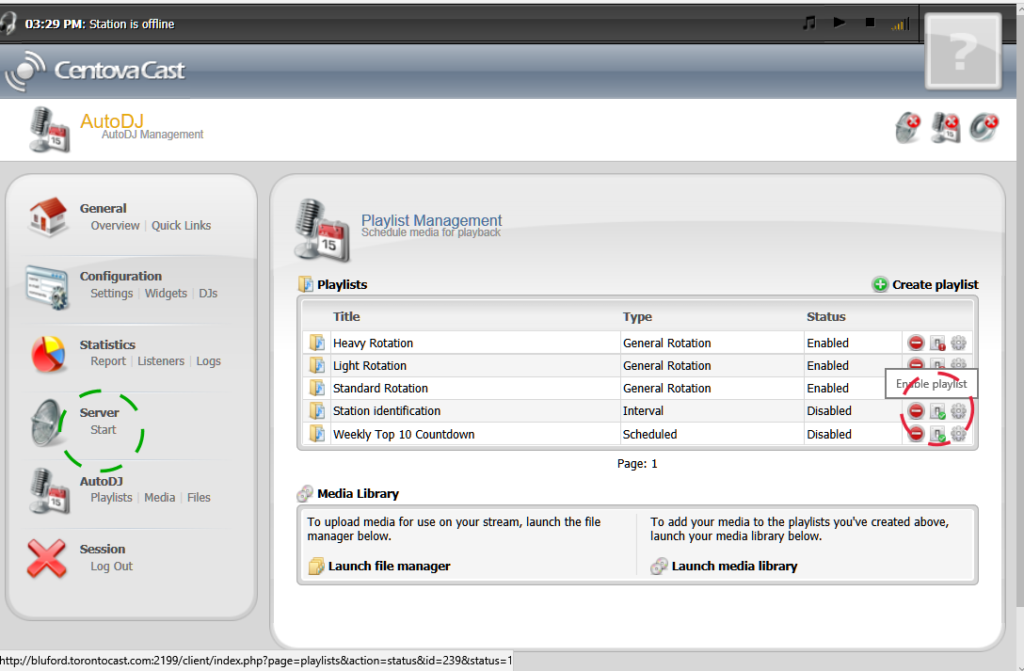
If you have added Jingles you will notice the Station identification playlist is disabled.
On the right hand-side there are three icons.
Click on the middle icon next to Station identification to enable this playlist.
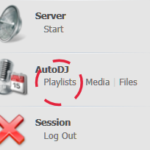
Finally, click on Start under Server in the navigation panel.
You are now broadcasting. So you are probably curious about somethings you have seen. Go and explore. Just now you have a station that will play 10 songs then a jingle. That easy.
If you have some favourite tunes, you can upload them to the heavy rotation playlist. This playlist will play these tracks more often than the standard rotation. (Standard plays more than light).
Click on Quick Links to find the details for listening to your stream, as well as some instructions on how to go live.